Personalizar lista
Grids are where you mainly handle the lists of alarms, timers, tasks, and so on. Hot Alarm Clock lets you customize grids in many ways.
The font size in the lists depends on the system font size. See also: How to change the size of text in Windows 10
Firstly, you can change the column order and column width. You can easily customize the column order by dragging column headers within the column header panel. You can resize columns by dragging their rightmost edges.
To sort the list by any column, click that column's header. If you click that header again, the sorting order will be inverted. To sort the list by several columns, click their headers one by one while holding the Shift key.

Filtering allows you to display a subset of records from a list. Hot Alarm Clock will enable you to construct complex filter criteria by combining simple filter conditions with logical operators for individual columns. A clickable filter icon will appear if you hover the mouse over a column header.

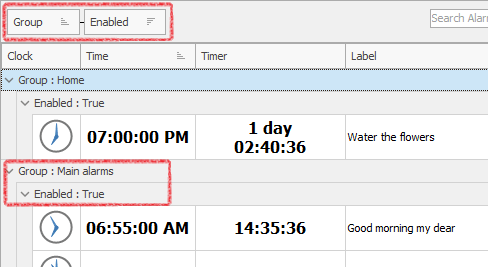
Grouping lets you divide rows into groups depending on the cell values. Drag one or more column headers to the grouping panel to group rows. To cancel grouping, drag the headers away from the grouping panel (when dragging a header, you should see a big black cross over it).
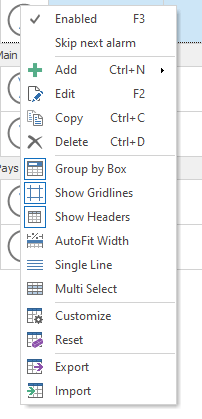
Note: If you do not see the grouping panel, right-click on the grid and select the Group by Box option.
- Collapse all, Expand all
- These buttons let you expand/collapse all group rows. You can use these buttons only if the rows are grouped by any columns.

On the Appearance tab, you can see more buttons for customizing grids. Any settings are applied separately for each grid. For example, you can turn off the grouping panel for some grids while keeping it for the others.
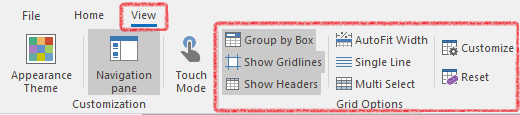
- Group by Box
- Determines whether the grouping panel is visible.
- Show Gridlines
- Specifies whether grid lines are visible.
- Show Headers
- Determines whether column headers are visible. Setting this property to False will disable all column operations (sorting, grouping, and moving).
- AutoFit Width
- This feature ensures that the total column width always matches the grid's width. Whether you resize the entire grid control or individual columns within it, AutoFit guarantees proportional spacing is maintained for all the columns within the grid. If a column's content is still too large to display without the grid needing to resize, then that column's values are truncated, and the hidden characters are replaced with an end ellipsis.
- Double-clicking a column's rightmost edge forces a column to adjust its width so that all the values within the column are fully displayed without truncation. Combined with AutoFit-Width, the Best Fit feature ensures that all columns are resized proportionally to display their content correctly.
- Single Line
- This toggle button lets you display rows in the grid in a special way: Each row will become smaller in height and contain only one line. The font size for displaying time or countdown will be reduced, and the icons will be reduced too.
- Multi Select
- You can select several rows and delete all of them at once.
- Customize
- Clicking this button invokes the Column Customization drop-down box, displaying column names in a checklist. You can toggle column visibility or reorder columns by dragging items within the drop-down box.
- Reset
- Clicking this button will reset all changes and settings for the current grid only.
- To restore the initial settings of all grids, open the Settings dialog box and click Restore Default Settings.
- Export and Import
- You can right-click the grid to see these items. These options let you export data from any grid to an XML file or import data from an XML file.