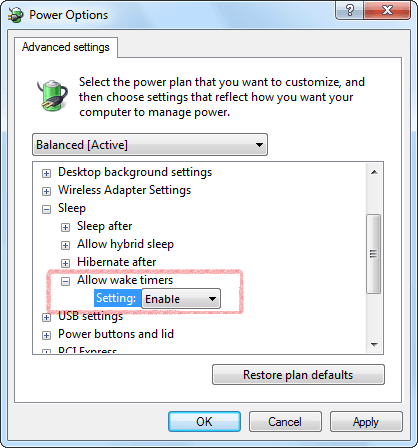
Allow Wake Timers
How to turn off require sign-in on wakeup in Windows Settings
Problem: The alarm sound does not play on the logon screen after sleep in Windows 10 or Windows 11.
To stop Windows 10 or Windows 11 from asking to sign in after resuming from sleep, use these steps:
- Open Settings.
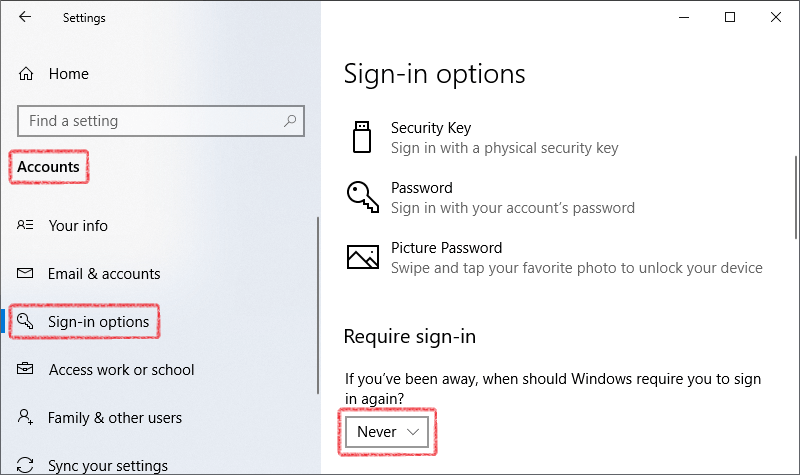
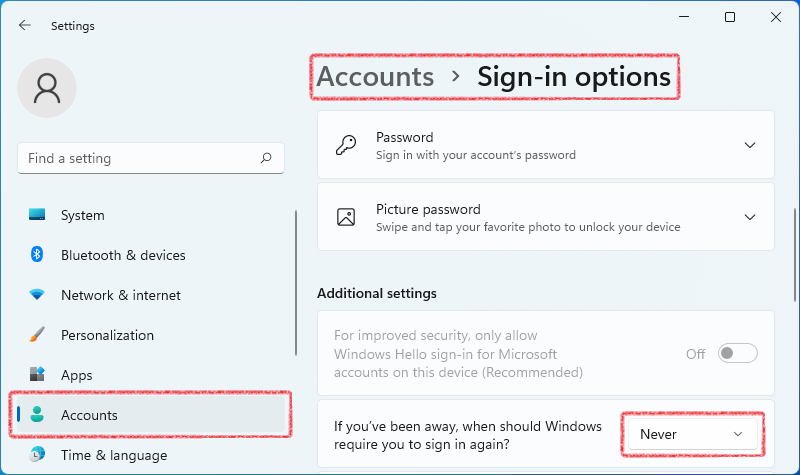
- Click on Accounts.
- Click on Sign-in options.
- Under the Require sign-in section, use the drop-down menu and select the Never option.
Once you complete the steps, you'll no longer be required to enter a password after waking up Windows from sleep.
Windows 10 Settings
Windows 11 Settings
Verify that Hot Alarm Clock is allowed to wake the computer
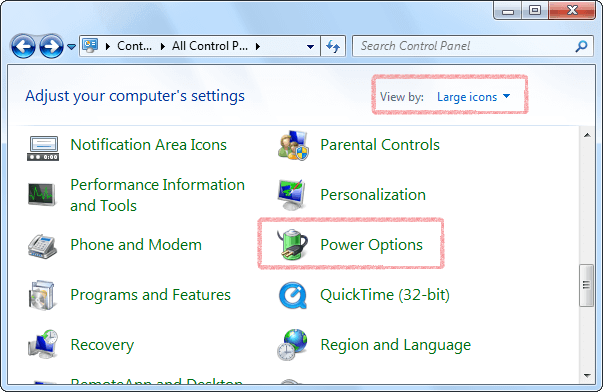
1. Open the Control Panel in the Start menu.
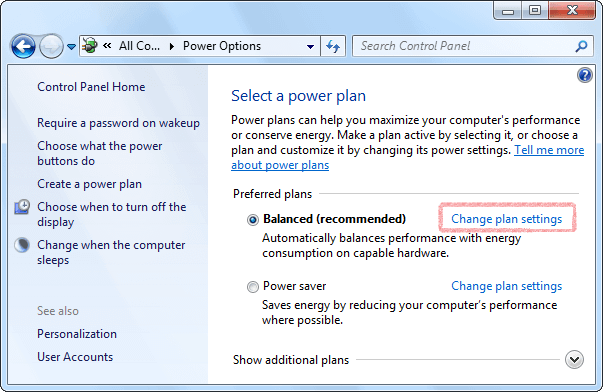
2. Open Power Options in the Control Panel.
Note: If Power Options item is not available, change View by to Large icons at the top right of the Control Panel.
3. Select Change plan settings next to the active power plan.
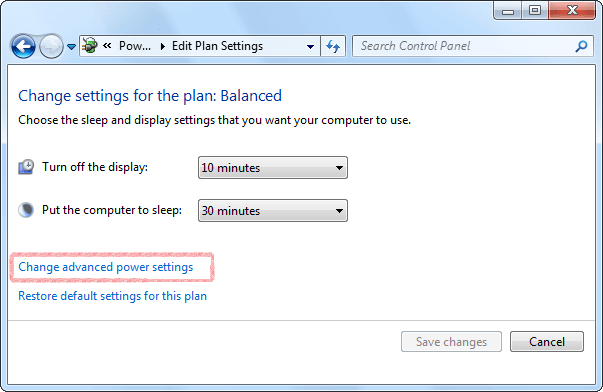
4. Click on Change advanced power settings.
5. Click on Change settings that are currently unavailable (if needed).
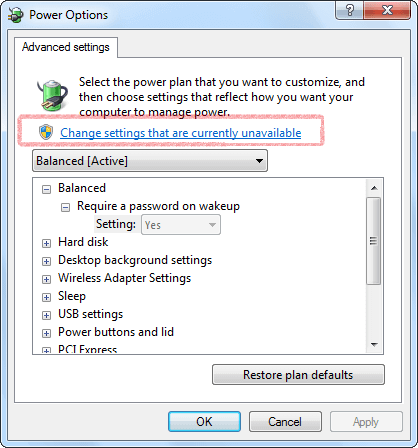
6. Set Allow Wake Timers to Enable under the Sleep item and then click OK to save the changes.